
using Colab, Google Earth Engine and Tensorflow
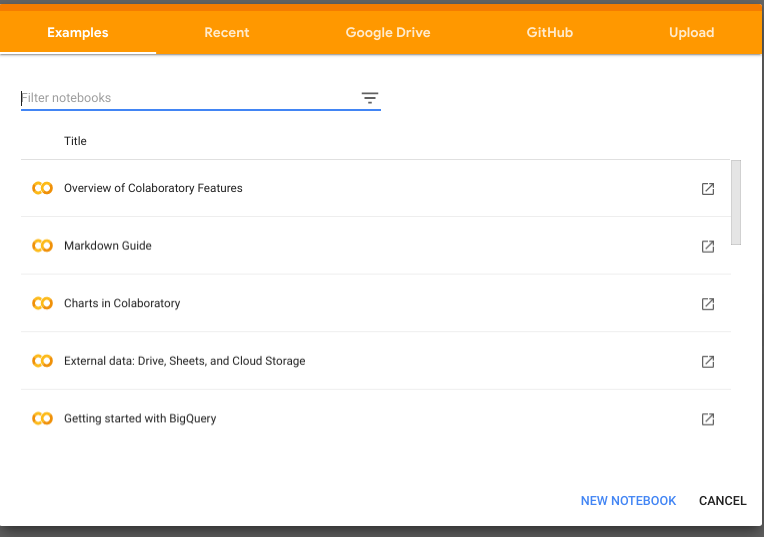
Step 1: create a new Colab notebook
step 2: insert a code block

step 3: install tensorflow
!pip install tensorflow==1.14
step 4: insert a new code block and install geemap
!pip install geemap
step 5: run the colab authentication
from google.colab import auth
auth.authenticate_user()
step 6: import the Google Earth Engine python library and use your google account for authentication
import ee
ee.Authenticate()
ee.Initialize()
step 7: connect with your google drive
from google.colab import drive
drive.mount('/content/mnt')
step 8: create a new folder where you can store your training data
%cd /content/mnt/My Drive
!mkdir cambodia
you can find the new folder by clicking on the files button on the left

step 9: get the training data points and show a map
import geemap.eefolium as geemap

# Import Training data from GEE Asset and show on Map
data = ee.FeatureCollection("projects/servir-mekong/referenceData/riceTraining");

# set rice as 1
rice = data.filter(ee.Filter.eq('land_class',1))
# set other class as 0
other = data.filter(ee.Filter.eq('land_class',0))

# zoom in on Cambodia
Map = geemap.Map(center=[12,105], zoom= 8)
# add the rice points to the map
Map.addLayer(rice,{},"rice");
# other points
Map.addLayer(other.draw("red"),{},"other");
Map

step 10: Get the Landsat composite and sample for training, testing and validation
#specify all band names
featureNames = ["blue","blue_p20","blue_p80","green","green_p20","green_p80","nir","nir_p20","nir_p80","red","red_p20","red_p80","swir1","swir1_p20","swir1_p80","swir2","swir2_p20","swir2_p80","thermal","thermal_p20","thermal_p80","land_class"]

# set the pixel size
# note this is a 1 by 1 pixel patch
xs = 1
myList = ee.List.repeat(1, xs)
myLists = ee.List.repeat(myList, xs)
kernel = ee.Kernel.fixed(xs, xs,myLists)

# Cloud Storage bucket into which training, testing and validation
# datasets will be written.  You must be able to write into this bucket.
folder = "cambodia"

# specify year
year = 2018
start = ee.Date.fromYMD(year,1,1)
end = ee.Date.fromYMD(year,12,31)

# import the image and apply scaling
image = ee.Image(ee.ImageCollection("projects/servir-mekong/regionalComposites").filterDate(start,end).first()).divide(10000)

# add a random column
trainingData = rice.merge(other).randomColumn("random")

# create the neighborhoodarray
neighborhood = image.unmask(0).neighborhoodToArray(kernel);

# get the training data from 2018
trainData = trainingData.filter(ee.Filter.eq("year",year))

# 70% for training, 20% for testing and 10% for validation
training = trainData.filter(ee.Filter.lt("random",0.7))
testing = trainData.filter(ee.Filter.gt("random",0.7)).filter(ee.Filter.lt("random",0.9))
validation = trainData.filter(ee.Filter.gt("random",0.9))

# sample the image
trainingSample= neighborhood.sampleRegions(collection=training,scale=30,tileScale=16)
testingSample= neighborhood.sampleRegions(collection=testing,scale=30,tileScale=16)
validationSample= neighborhood.sampleRegions(collection=validation,scale=30,tileScale=16)

# create an export task for training, testing and validation
trainingTask = ee.batch.Export.table.toDrive(collection=trainingSample,\
							description="train"+str(year),
              folder = folder,
							fileNamePrefix= "training"+str(year),
							fileFormat='TFRecord',
							selectors=featureNames)

testingTask = ee.batch.Export.table.toDrive(collection=testingSample,\
							description="test"+str(year),
              folder = folder,
							fileNamePrefix="testing"+str(year),
							fileFormat='TFRecord',
							selectors=featureNames)

validationTask = ee.batch.Export.table.toDrive(collection=validationSample,\
							description="val"+str(year),
              folder = folder,
							fileNamePrefix="validation"+str(year),
							fileFormat='TFRecord',
							selectors=featureNames)

# Start the tasks
trainingTask.start()
testingTask.start()
validationTask.start()
You can find the export tasks in your code editor.
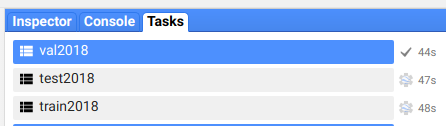
step 11: get a coffee and wait for the export task to finish


When finished you should be able to see the files in the folder
Step 12: import the tfrecords into tensorflow
import tensorflow as tf
import numpy as np
from tensorflow import keras
import datetime
import subprocess
from tensorflow.keras import backend as K


tf.enable_eager_execution()

# List of fixed-length features, all of which are float32.
size = 1

# How many classes there are in the model.
nClasses = 2

shuffle_size = 1000
batch_size = 100

# set class name and labels
label = "land_class"
bands = ["blue","blue_p20","blue_p80","green","green_p20","green_p80","nir","nir_p20","nir_p80","red","red_p20","red_p80","swir1","swir1_p20","swir1_p80","swir2","swir2_p20","swir2_p80","thermal","thermal_p20","thermal_p80"]

# sort and print the bands to ensure the band order
bands = sorted(bands)
print(bands)

# get the location of all files
calibrationData = '/content/mnt/My Drive/cambodia/training2018.tfrecord.gz'
testingData = '/content/mnt/My Drive/cambodia/testing2018.tfrecord.gz'
validationData = '/content/mnt/My Drive/cambodia/validation2018.tfrecord.gz'


## Create a dataset from the TFRecord file in Cloud Storage.
trainDataset = tf.data.TFRecordDataset(calibrationData, compression_type='GZIP')
testDataset = tf.data.TFRecordDataset(testingData, compression_type='GZIP')
validationDataset = tf.data.TFRecordDataset(validationData, compression_type='GZIP')

#it = iter(trainDataset)
# get length of input array and make list
l = len(bands)
featureNames = list(bands)
featureNames.append(label)

print("featurenames",featureNames)

columns = [
  tf.io.FixedLenFeature(shape=[size,size], dtype=tf.float32) for k in featureNames
]

## Dictionary with names as keys, features as values.
featuresDict = dict(zip(featureNames, columns))

print(featuresDict)
def parse_tfrecord(example_proto):
  """The parsing function.

  Read a serialized example into the structure defined by featuresDict.

  Args:
    example_proto: a serialized Example.

  Returns:
    A tuple of the predictors dictionary and the label, cast to an `int32`.
  """
  parsed_features = tf.io.parse_single_example(example_proto, featuresDict)
  labels = parsed_features.pop(label)
  return parsed_features, tf.cast(labels, tf.int32)

# Map the function over the dataset.
trainDataset= trainDataset.map(parse_tfrecord)
testDataset = testDataset.map(parse_tfrecord)
validationDataset = validationDataset.map(parse_tfrecord)

# Keras requires inputs as a tuple.  Note that the inputs must be in the
# right shape.  Also note that to use the categorical_crossentropy loss,
# the label needs to be turned into a one-hot vector.
def toTuple(Dict, label):
  return tf.transpose(list(Dict.values())), tf.one_hot(indices=label, depth=nClasses)


# Repeat the input dataset as many times as necessary in batches.
trainDataset = trainDataset.map(toTuple).shuffle(shuffle_size,reshuffle_each_iteration=True).batch(batch_size).repeat()
testDataset = testDataset.map(toTuple).shuffle(shuffle_size).batch(batch_size).repeat()
validationDataset = validationDataset.map(toTuple).shuffle(shuffle_size).batch(batch_size).repeat()
step 13: Define your and compile your model
# Define the layers in the model.
model = tf.keras.models.Sequential([
  tf.keras.layers.Input((size, size, l,)),
  tf.keras.layers.Conv2D(64, (1, 1), activation=tf.nn.relu),
  tf.keras.layers.Dropout(0.15),
  tf.keras.layers.Conv2D(32, (1, 1), activation=tf.nn.relu),
  tf.keras.layers.Dropout(0.15),
  tf.keras.layers.Conv2D(16, (1, 1), activation=tf.nn.relu),
  tf.keras.layers.Dropout(0.15),
  tf.keras.layers.Conv2D(2, (1, 1), activation=tf.nn.softmax)
])

# Compile the model with the specified loss function.
model.compile(optimizer=tf.keras.optimizers.Adam(),
              loss=keras.losses.categorical_crossentropy,
              metrics=['accuracy'])
step 14: train the model
#set early stop
early_stop = tf.keras.callbacks.EarlyStopping(monitor='loss', patience=10, verbose=0, mode='min')


# Fit the model to the training data.
# Don't forget to specify `steps_per_epoch` when calling `fit` on a dataset.
training = model.fit(x=trainDataset,\
					 epochs=10,\
					 steps_per_epoch=100,\
					 validation_data = testDataset,\
					 validation_steps = 10,\
					 callbacks=[early_stop])

%pylab inline
plot(training.history['loss'],'x--')
plot(training.history['acc'], 'o--')

Step 15: Evaluate the model
# evaluate the model
evaluate = model.evaluate(validationDataset,steps=10)
print(evaluate)
Step 16: Save the model
# save model
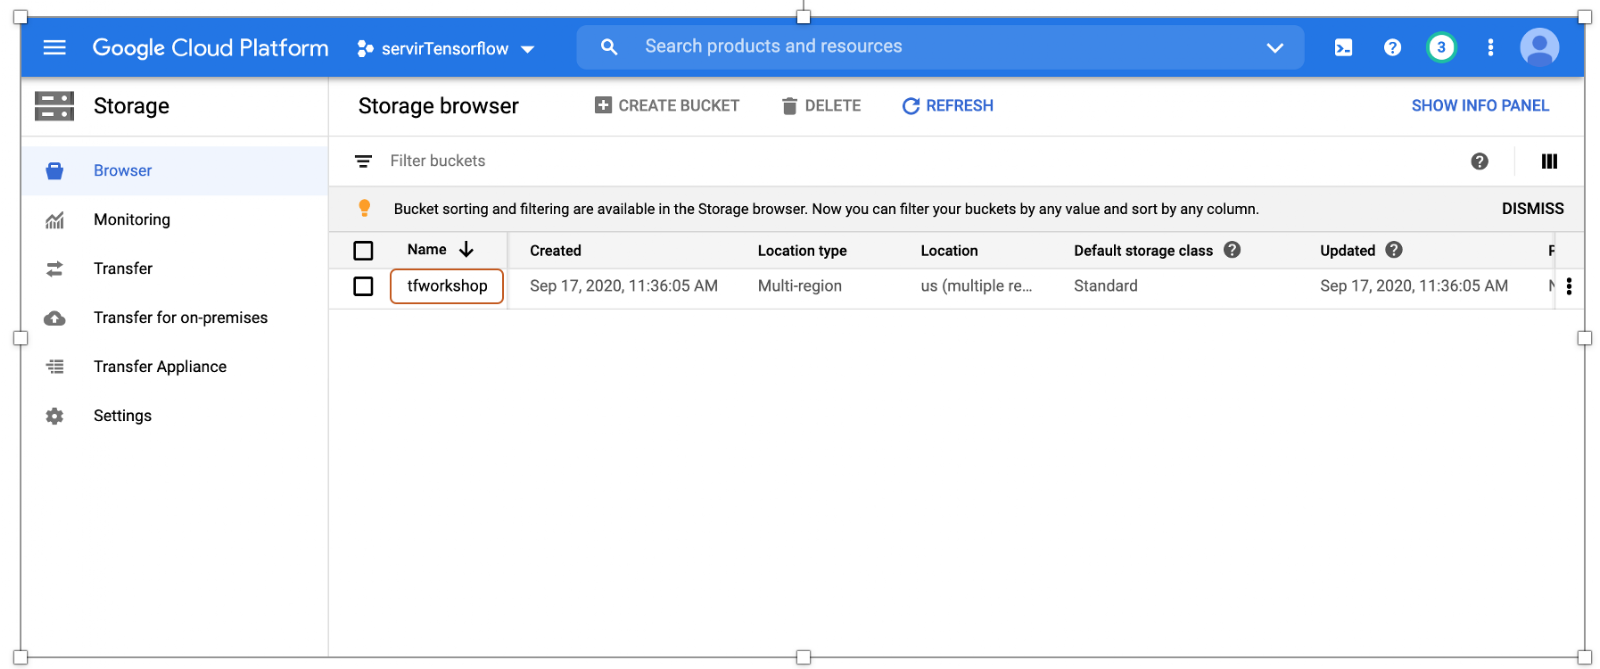
outputBucket = "tfworkshop"
MODEL_DIR = '/content/cambodia/model1/'
tf.saved_model.save(model, MODEL_DIR)
step 17: set input and output names so earth engine can read it
note: please change the name of the user!
from tensorflow.python.tools import saved_model_utils

meta_graph_def = saved_model_utils.get_meta_graph_def(MODEL_DIR, 'serve')
inputs = meta_graph_def.signature_def['serving_default'].inputs
outputs = meta_graph_def.signature_def['serving_default'].outputs

# Just get the first thing(s) from the serving signature def.  i.e. this
# model only has a single input and a single output.
input_name = None
for k,v in inputs.items():
  input_name = v.name
  break

output_name = None
for k,v in outputs.items():
  output_name = v.name
  break

# Make a dictionary that maps Earth Engine outputs and inputs to
# AI Platform inputs and outputs, respectively.
import json
input_dict = "'" + json.dumps({input_name: "array"}) + "'"
output_dict = "'" + json.dumps({output_name: label}) + "'"

print(input_dict)
print(output_dict)

name = "eeUser"

# Put the EEified model next to the trained model directory.
EEIFIED_DIR = '/content/cambodia/modeleeified' + name
PROJECT = 'servirtensorflow'

print(EEIFIED_DIR)
# You need to set the project before using the model prepare command.
!earthengine set_project {PROJECT}
!earthengine model prepare --source_dir {MODEL_DIR} --dest_dir {EEIFIED_DIR} --input {input_dict} --output {output_dict}
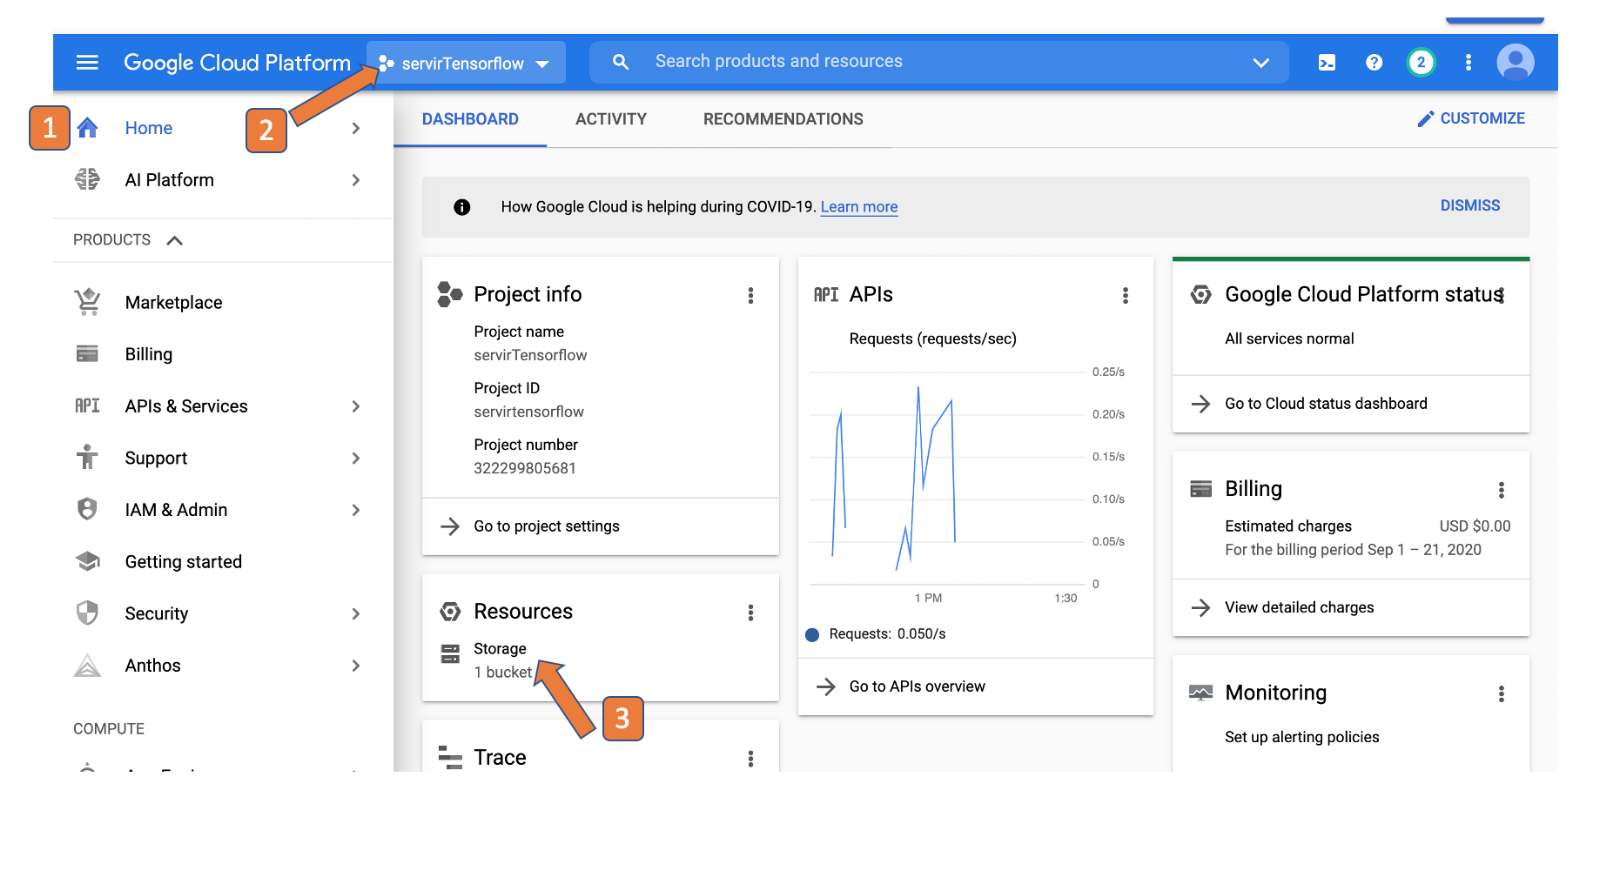
Step 18: setup google cloud project to move the model to the cloud bucket
!gcloud init
!gsutil ls gs://tfworkshop
step 19: Move your model to the cloud
note: change the eeUser to the name you set before!
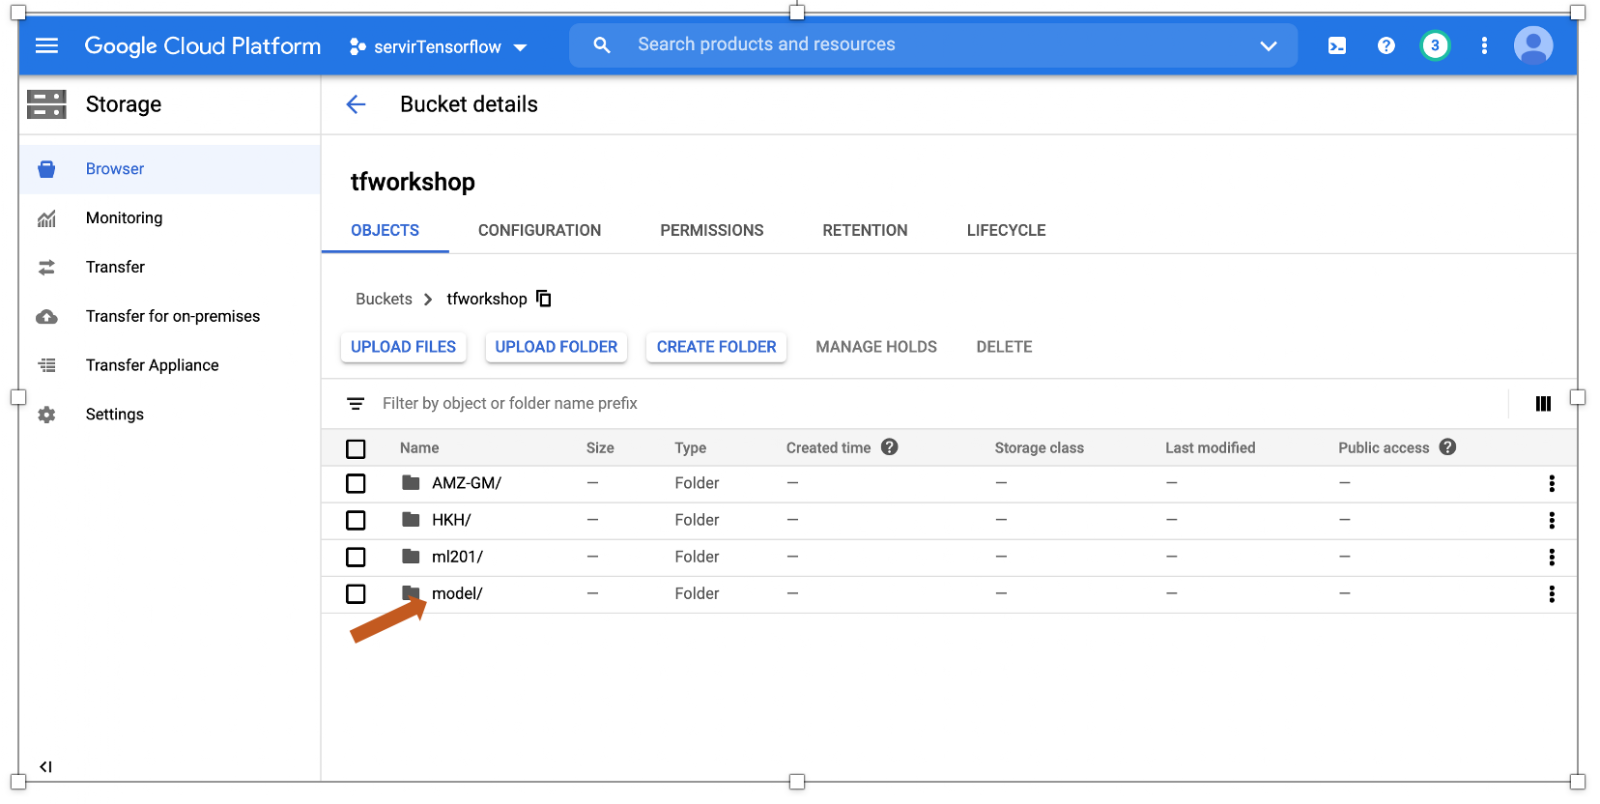
!gsutil cp -r /content/cambodia/modeleeifiedeeUser gs://tfworkshop/model/
you can check your model in the cloud
Step 20: Deploy and host your model on the AI platform
MODEL_NAME = 'ricemodel'
VERSION_NAME = yourname
EEIFIED_DIR = "gs://tfworkshop/model/modeleeifiedeeUser"


print('Creating version: ' + VERSION_NAME)

#!gcloud ai-platform models create {MODEL_NAME} --project {PROJECT}
!gcloud ai-platform versions create {VERSION_NAME} \
  --project {PROJECT} \
  --model {MODEL_NAME} \
  --origin {EEIFIED_DIR} \
  --runtime-version=1.14 \
  --framework "TENSORFLOW" \
  --python-version=3.5
you can find your model in the AI console


Congratulations! You built a DNN and moved the model to the AI platform.
Step 21: open the code editor and add the code below.
Note: change the name of the model to the one you used before!
var BANDS =  ['blue', 'blue_p20', 'blue_p80', 'green', 'green_p20', 'green_p80', 'nir', 'nir_p20', 'nir_p80', 'red', 'red_p20', 'red_p80', 'swir1', 'swir1_p20', 'swir1_p80', 'swir2', 'swir2_p20', 'swir2_p80', 'thermal', 'thermal_p20', 'thermal_p80'];
var PROJECT = 'servirtensorflow';
var MODEL_NAME = 'ricemodel';
var VERSION_NAME = name of your model;
var INSHAPES = ee.Dictionary({"qa":[21]});

var countries = ee.FeatureCollection("USDOS/LSIB_SIMPLE/2017");
var cambodia = countries.filter(ee.Filter.eq("country_na","Cambodia"));

var image = ee.Image("projects/servir-mekong/regionalComposites/2018").divide(10000);
image = image.select(BANDS).toFloat().unmask(0);


// Load the trained model and use it for prediction.
var model = ee.Model.fromAiPlatformPredictor({
    projectName: PROJECT,
    modelName: MODEL_NAME,
    version: VERSION_NAME,
    inputTileSize: [64,64],
    proj: ee.Projection('EPSG:4326').atScale(300),
    fixInputProj: true,
    outputBands: {'land_class': {
        'type': ee.PixelType.float(),
        'dimensions': 1
      }
    }
});

// run the prediction
var predictions = model.predictImage(image.toArray()) .arrayFlatten([['other',"land_class"]]).toFloat();

// add the layer to the map
Map.addLayer(ee.Image(predictions.select("land_class")).clip(cambodia),{min:0.00,max:0.95,palette:'white,red,darkred',opacity:0.9},'DNN Prediction');
Find the complete notebook here
Find the code editor example here

Impressive publication from which I definitely learnt a lot.
Quick question: I am currently working on multi-temporal deep learning classification of landuse in a whole country following the same logic of your exercise in here (I have multitemporal shapefiles with ground truth data). However, when I arrive to step 10, I get the following error “Error: Image.reduceRegions: Unable to use a collection in an algorithm that requires a feature or image. This may happen when trying to use a collection of collections where a collection of features is expected; use flatten, or map a function to convert inner collections to features. Use clipToCollection (instead of clip) to clip an image to a collection.”
Can you please advise?
LikeLike
I think you are trying to sample a collection. you can apply reduceRegions only on an image. When applying on an image collection you will need to map of the image collection and sample each image individually.
LikeLike
Hi, thank you a lot for your instruction, could you pls give some more detail about how to get confusion matrix and kappa coefficient. I would much appreciate it.
LikeLike
Hi! Thanks for your useful article! We are trying to implement it for West Siberian floodplains, so we have a problem on step 18+ with the google cloud storage: AccessDeniedException: 403 …does not have storage.objects.list access to the Google Cloud Storage bucket. Of course, we read a lot of documentation and set proper roles to the account with no success. Maybe you had the same problem and solved it or have interesting ideas about it? Thanks in advance. Irina Terentieva.
LikeLike
Did you setup the cloud bucket and added the users under IAM & Admin?
LikeLike
how did you get the training data points and show a map?
I am really interested to do this in our province.
LikeLike
great work
LikeLike
Thank you for your pretty good tutorial. I want to know whether the image can be directly predicted without the help of google cloud platform.
LikeLike
only using the classifiers that are built into ee..
LikeLike
Thank you very much, it is convenient to ask what is contained in your Imagecollection, how can I create my own Imagecollection and upload it to GGE.Thanks!
LikeLike
Your tutorial is very good. How could I export the sorted image so that I can work in qgis or arcgis?
LikeLike
Could you share the input file:
import the image and apply scaling
image = ee.Image(ee.ImageCollection(“projects/servir-mekong/regionalComposites”).filterDate(start,end).first()).divide(10000)
LikeLike